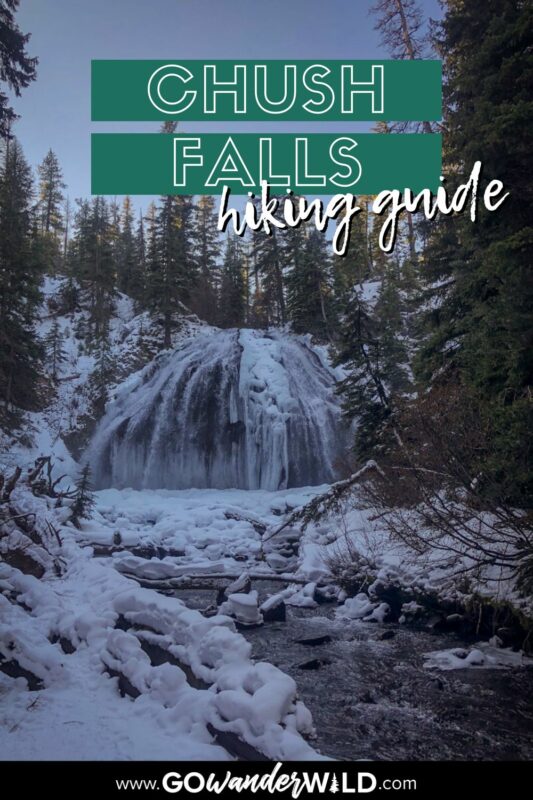
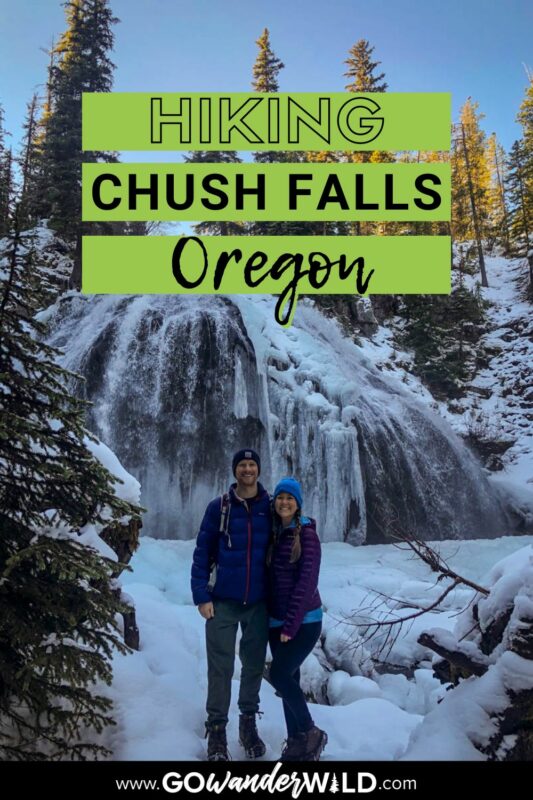
Underrated Chush Falls belongs high on your central Oregon bucket list, with its wide, impressive cascade, fairly easy hike, and early season accessibility. We put together this trail guide so you know exactly what to expect as you plan your Chush Falls hike.
A pleasant, family-friendly hike near Bend, Chush Falls brilliantly shows off everything central Oregon is known for. In addition to the stunning waterfalls (yep, plural—you can actually see three on this trail!), there are deep canyons, snow-capped peaks, and even wildfire damage.
Making it all the more appealing, Chush Falls is almost never crowded—a rarity among Oregon waterfall hikes in general. It’s also one of the first trails in this area to be free of snow each spring.
Add in the trailhead’s relatively easy access, multiple endpoint options, and dog-friendliness, and it’s honestly surprising Chush Falls isn’t more popular!
Chush Falls Hiking Guide
- Chush Falls trail stats
- Hike overview
- Chush Falls trail map
- Know before you go
- The route
- Tips for hiking to Chush Falls
- Where to camp nearby
- What to pack

Chush Falls trail stats
- Location: Three Sisters Wilderness, about one hour from Bend in Deschutes National Forest
- Distance: 5.9 miles out and back
- Elevation gain: 850 feet
- Difficulty rating: easy to moderate
- Timing: 2.5-3 hours
- Pets: leashed dogs welcome
- Permits: Northwest Forest Pass or America the Beautiful Pass required to park at the trailhead, and a Central Cascades Wilderness Permit for overnight camping June 15 to October 15
- Trail notes on Alltrails
Chush Falls hike overview
Although Chush Falls isn’t hidden or a secret by any means (the small parking lot fills up on summer weekends), the noticeable lack of trail traffic almost suggests otherwise. The trail just never seems particularly busy, especially compared to many other Oregon waterfalls!
If you love a good waterfall hike—really, who doesn’t?—and prefer more off-the-beaten-path experiences, this one will quickly become your new favorite. Not only does the trail lead you to the namesake falls, but you can continue just a bit further to two other waterfalls, as well.
En route to the falls, you’ll hike alongside Whychus Creek and enjoy head-on views of the iconic Three Sisters and Broken Top. All this bang for the buck, and the trailhead is less than one hour from Bend…and you have an excuse to stop in the adorable small town of Sisters on the way!
Chush Falls trail map
Things to know before you go
While the hike to Chush Falls is simple and straightforward, there are still several things to keep in mind as you plan your adventure.
Best time of year for hiking to Chush Falls
Late summer into early fall, mid-June through mid-October, are the best times to hike to Chush Falls. During this time, you should avoid snow (mostly, anyway—’June-uary’ weather is a real thing in the PNW!), and you can catch summer wildflowers or fall foliage.
One thing to be aware of when hiking in central Oregon in the summer is that it gets HOT. Often quite a bit hotter than the coast! On the Chush Falls trail specifically, because of the lack of tree cover, you’ll be fully exposed to the sun. Bring sun protection!
How long does it take to hike to Chush Falls?
Plan on about 2.5-3 hours for hiking to Chush Falls. Your individual hiking pace and how much time you spend at the waterfall will have an impact on your time, of course, but this is a safe overall estimate.
How difficult is the Chush Falls hike?
The hike to Chush Falls is pretty easy, even for children and beginner hikers. Its ‘moderate’ rating is likely due to its 5-ish mile length, as well as the abundance of downed trees on the trail. Navigating around and over them is the most challenging aspect of this hike.
The route
We broke down the route for hiking the Chush Falls trail into parts to give you an idea of what to expect on the route.
Getting to the trailhead
As you make your way to the trailhead from Sisters, be aware that GPS isn’t always reliable. Based on reports online, it leads you to the correct spot sometimes, but certainly not 100% of the time.
We detail the exact directions in the tips section below, but basically, you want to make sure that you turn left immediately before the concrete bridge on FR 1514, not after. GPS sometimes leads you to the original road, made unusable by the 2012 Pole Creek Fire.
The last five-ish miles of the drive are on a rough gravel road. It’s totally manageable for any type of vehicle, but something you’ll want to be prepared for. When you arrive in the small lot, look for the trailhead sign at the south end.
Note: The sign at the trailhead indicates the end of the trail is just two miles away, but it’s definitely a bit further. Not much further, and not a difficult stretch at all, but still worth noting.
As you head out from the parking lot, make sure to get a free self-issued wilderness permit at the trailhead kiosk (required June 15-October 15, whether you’re camping overnight or just day hiking).
Chush Falls Trail: Part I
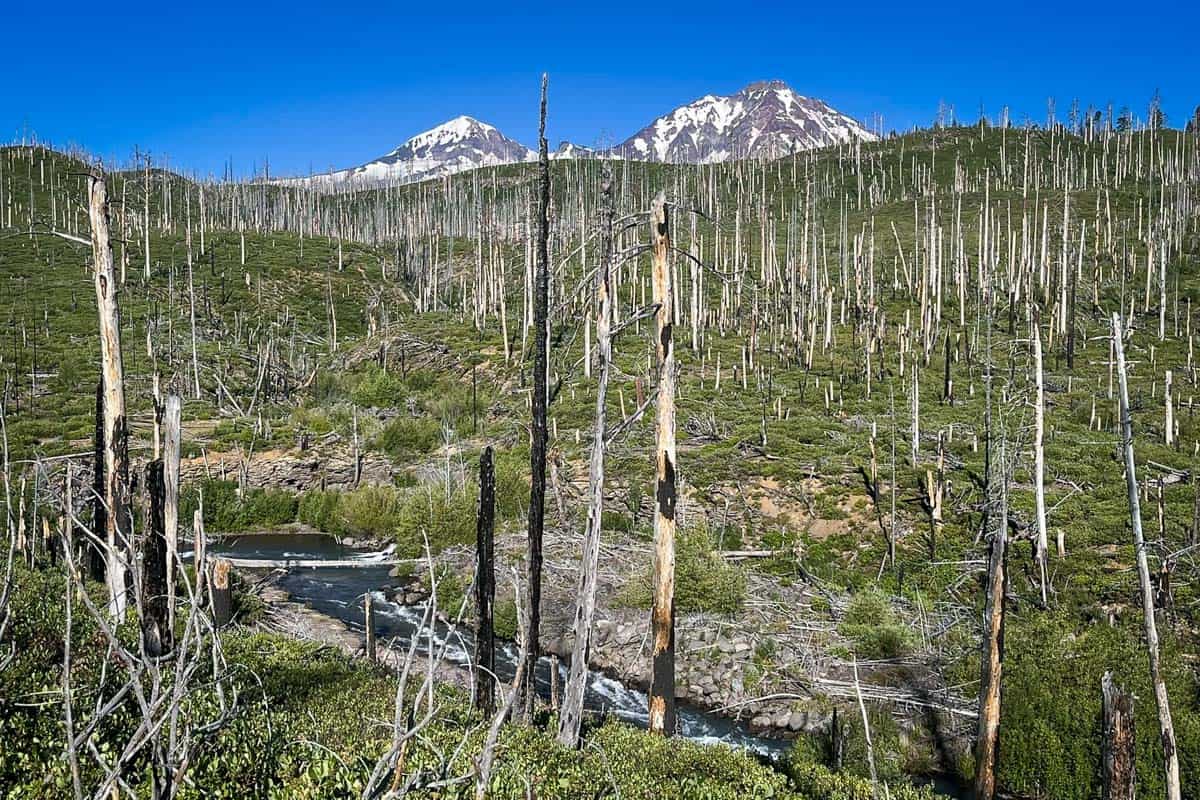
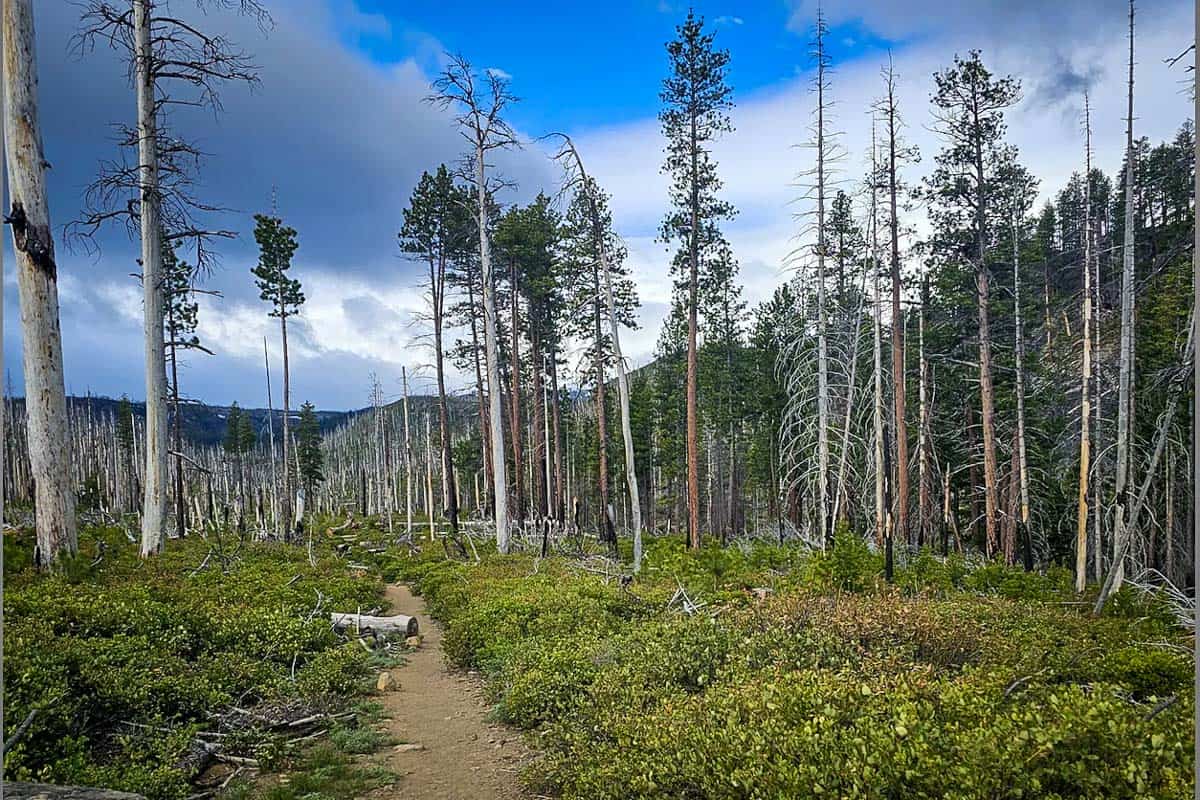
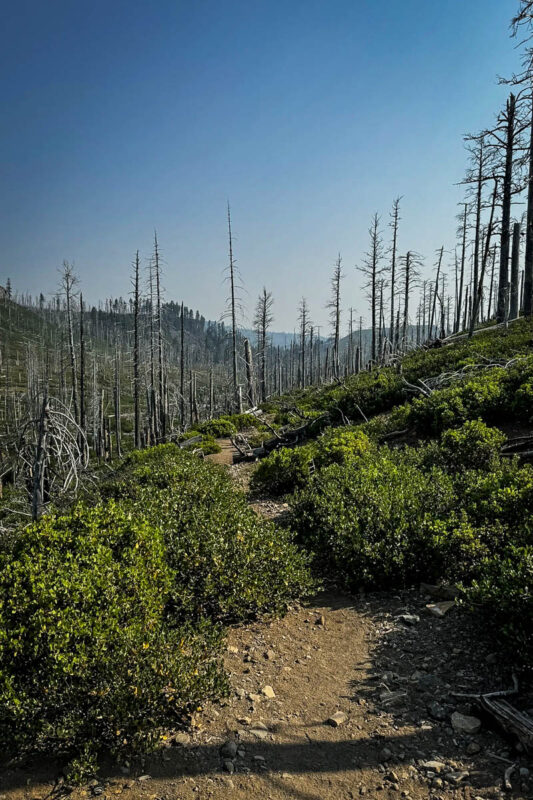
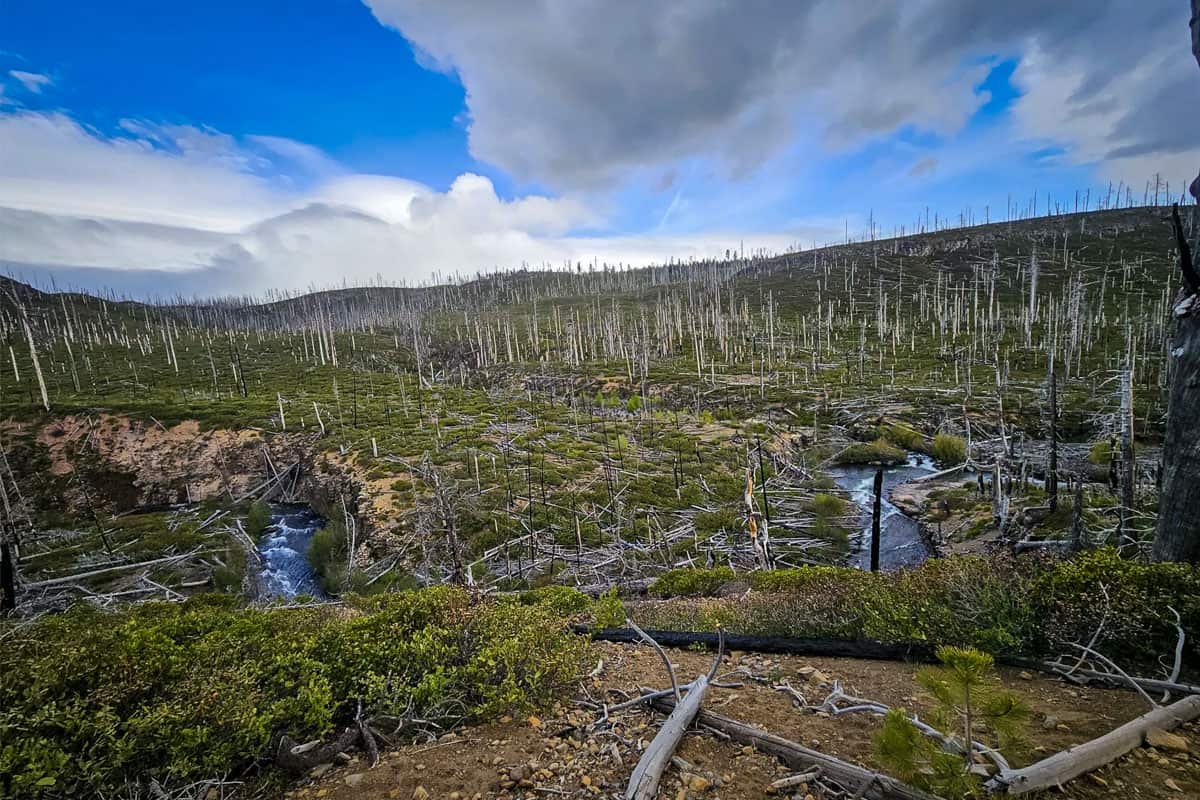
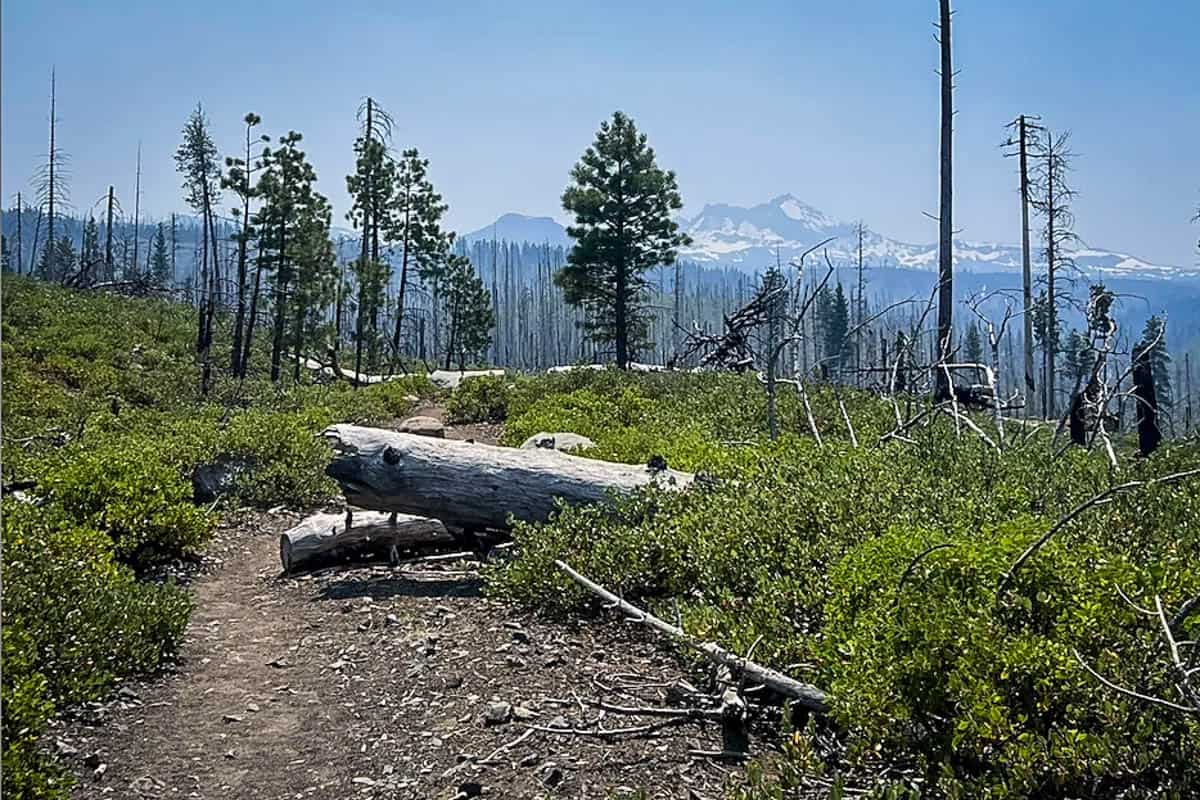
The first part of the trail is easy, following an old road that’s wide and flat. It also passes through a large area burned in the 2012 wildfire.
Although it’s a somber sight, the lack of vegetation is a trade-off…now you have unobstructed, perfectly-framed views of Broken Top and the Sisters. South Sister especially shines!
After the first mile, the trail narrows to a more traditional single-track trail and starts to ascend very slightly uphill. Depending on the time of year and recent rainfall, you may pass a few small streams. Summer wildflowers really pop in this section, also.
Chush Falls Trail: Part II
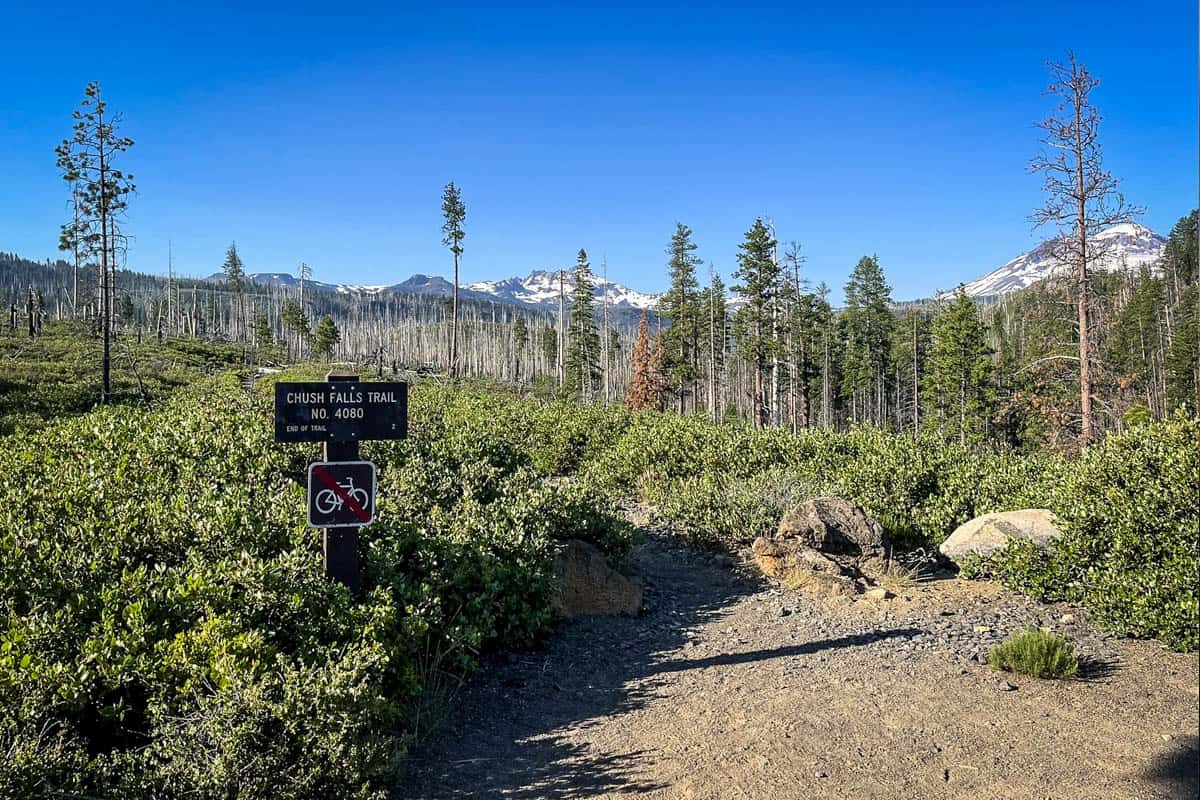
Right around the two-mile mark, you’ll hear the roar of the falls. Shortly after, you’ll be at the ‘official’ end of the trail (marked with a “Trail Ends Here” sign).
Just to the left of the sign, you’ll find an overlook with a view of the falls in the canyon below. Truthfully, this view is actually pretty disappointing, as it’s almost completely obscured by trees.
Chush Falls views
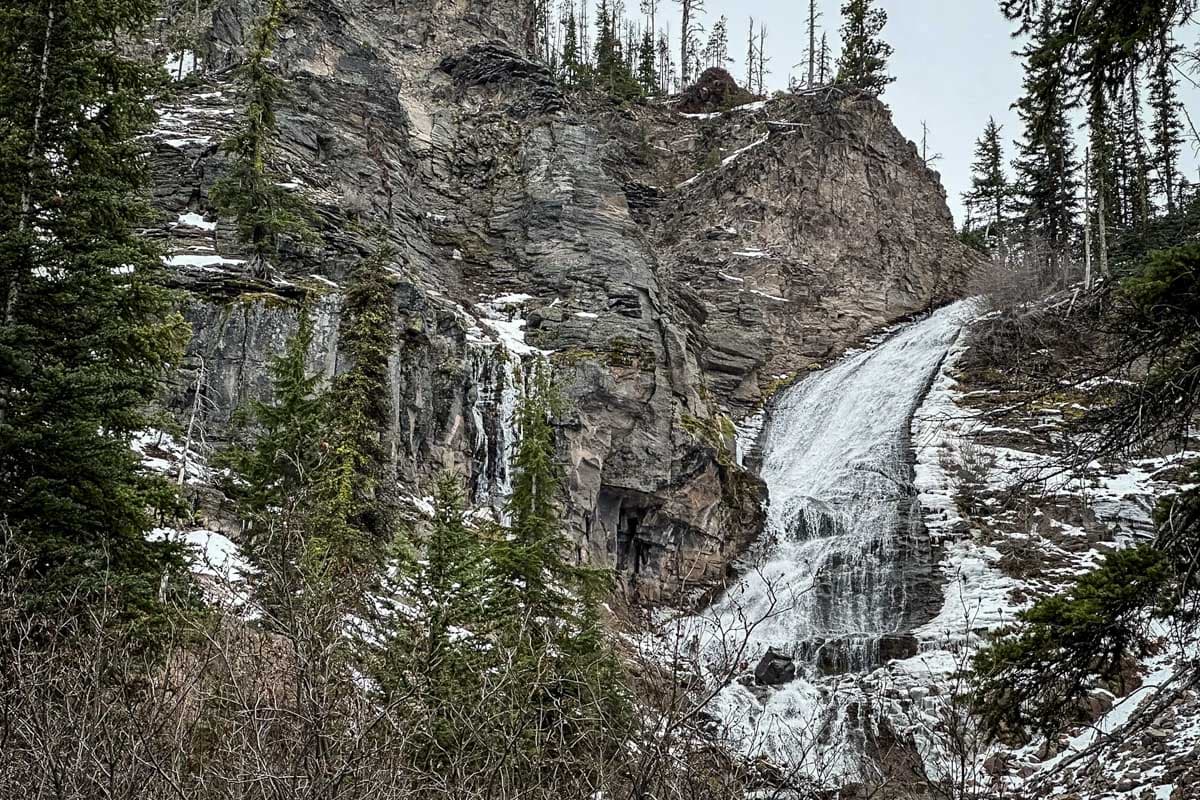
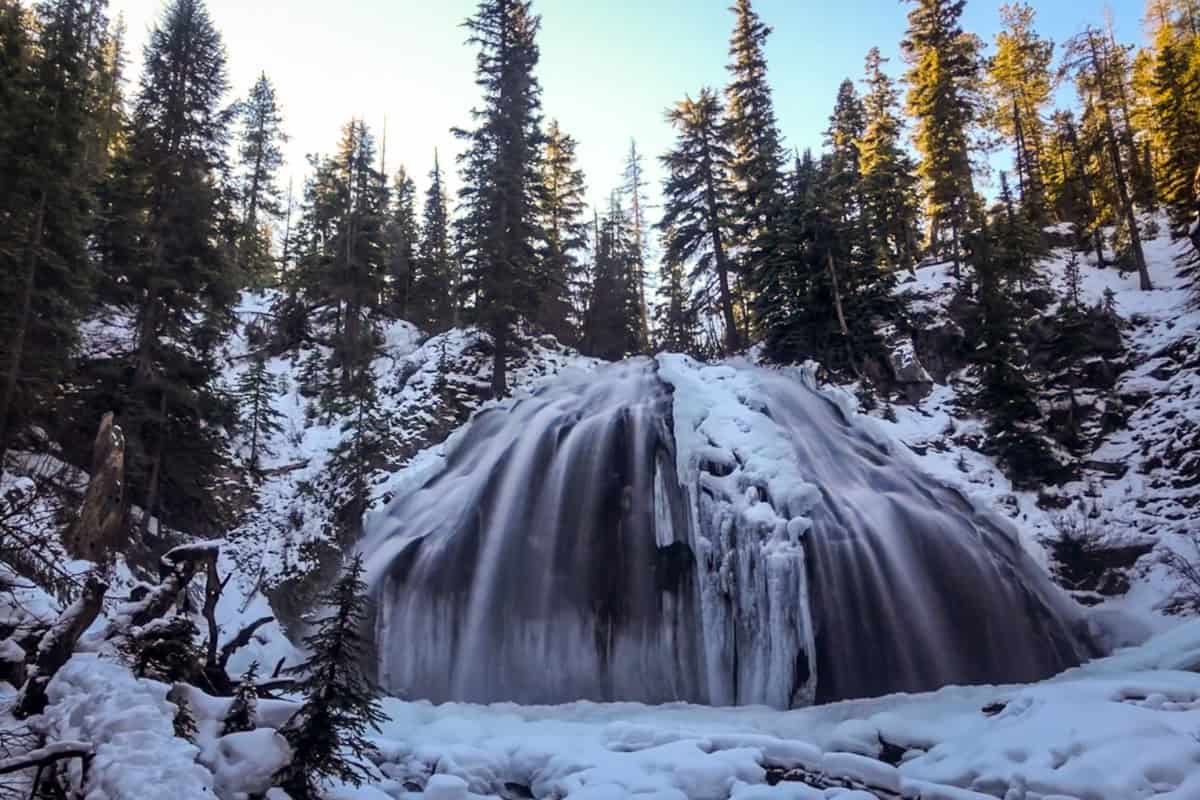
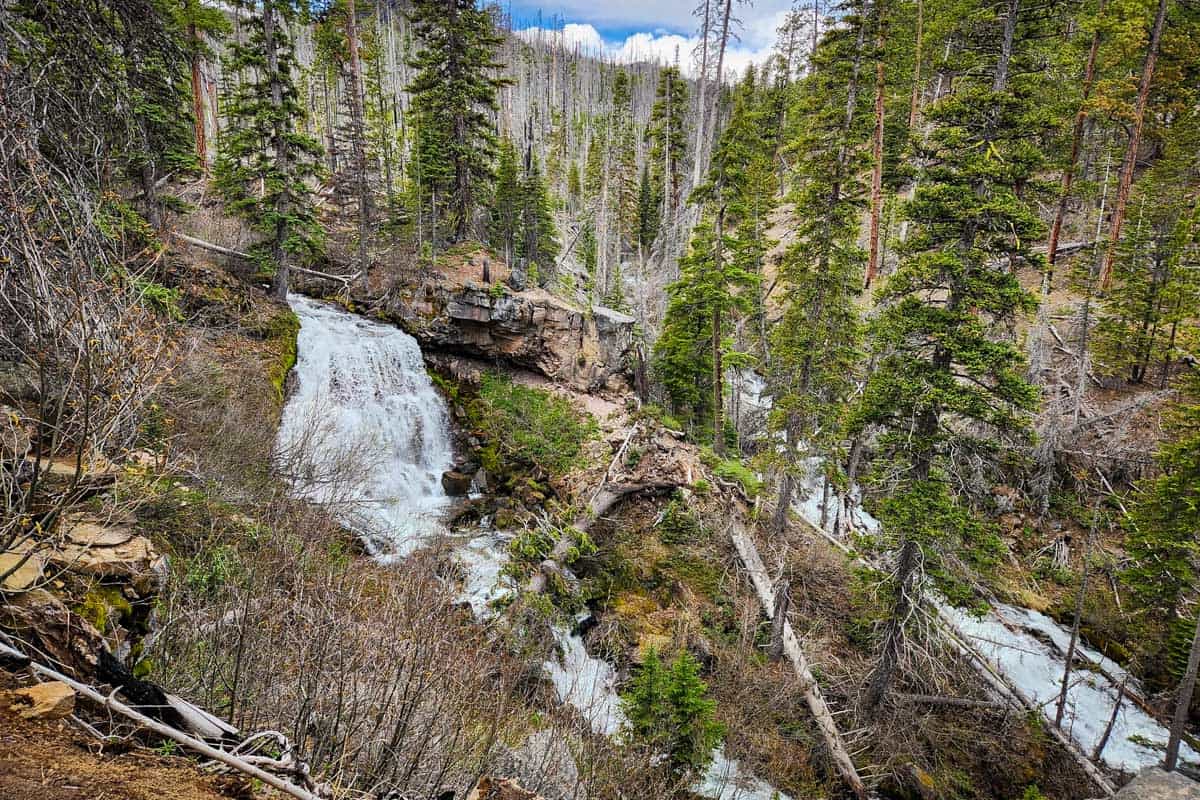
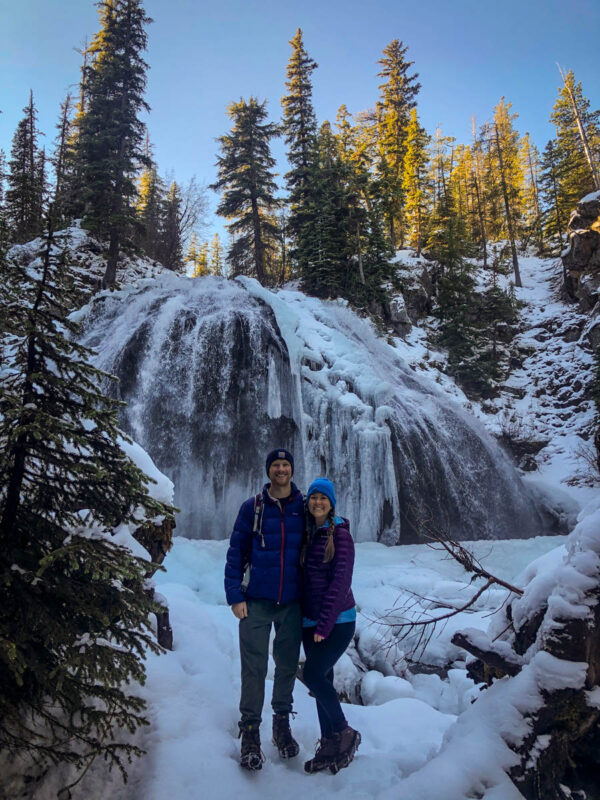
For a far better view, head to the right of the trail sign, where you’ll find a fairly well-worn social trail leading to the base of the falls.
It descends pretty steeply about 100 feet down into the canyon, but it’s well worth the effort. Use trees as hand-holds or crouch down and sort of scoot on your butt.
Once you get to the bottom of the makeshift trail, you’ll be standing at the base of the thundering falls. After snapping pictures and soaking up the view for awhile (literally—the spray of the falls will get you wet!), scramble back up the hillside and head back the way you came.
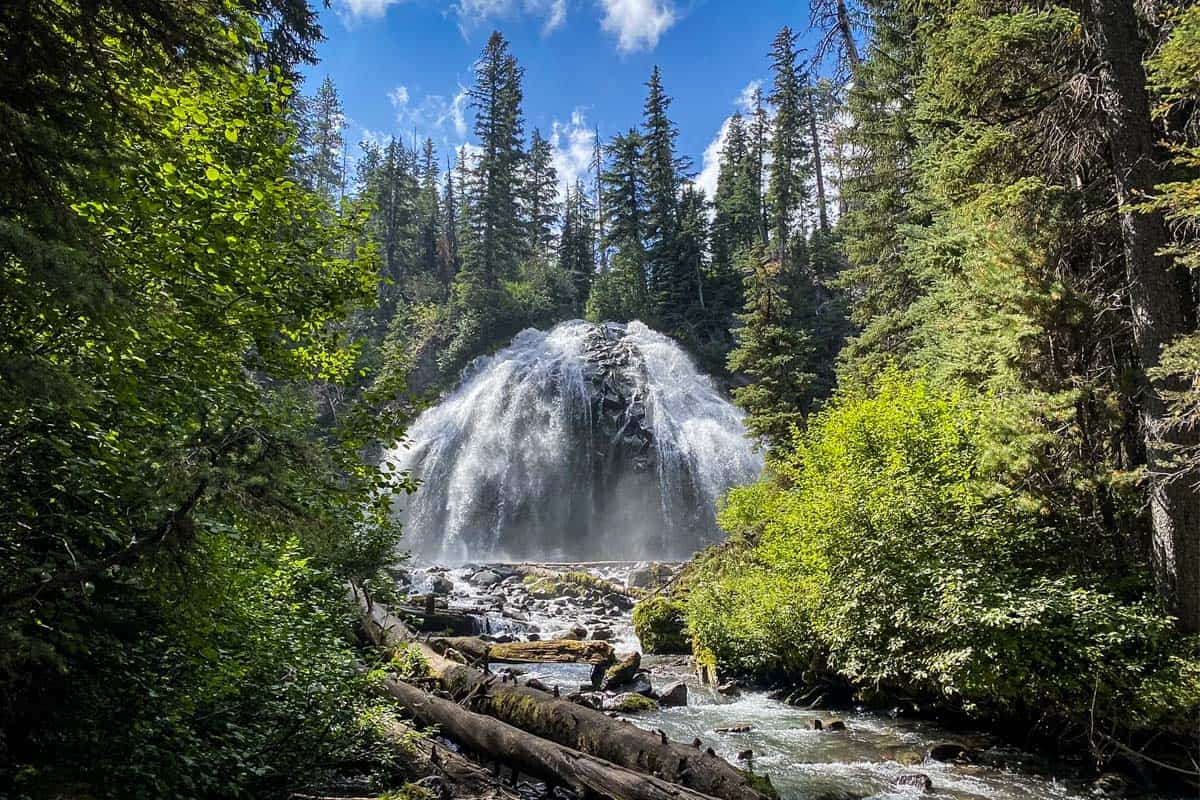
Or…if you’re up for more of an adventure, hike another half-mile upstream from the official viewpoint to see two more gorgeous waterfalls.
You’ll come to “The Cascades” (AKA Middle Chush Falls), an even lesser-visited 25-foot waterfall, in about 0.3 miles. Just after that, you’ll reach yet another one, 225-foot-tall Upper Chush Falls.
There’s no official trail between Chush Falls and these two, but the path is traveled often enough that you can follow it pretty easily. However, it’s not maintained, so expect a rougher trail with lots of downed trees.
If you hike to all three waterfalls, your total distance should clock in at about 6.5 miles round-trip.
Tips for hiking to Chush Falls
- There are NO services available in the parking lot or along the trail. This is a true Wilderness Area, so make a pit stop for drinks, snacks, and to use the restroom before arriving.
- You’ll need a parking pass. You can use an annual Northwest Forest Pass or America the Beautiful Pass, or a National Forest Day Pass ($5 and you can buy it online).
- Be sure to also get a Wilderness Permit at the trailhead. It’s free and self-issued; you just fill out the information at the trailhead kiosk.
- No motorized or mechanical equipment is allowed. Because Chush Falls is in a designated Wilderness Area, this restriction applies to bicycles and drones in addition to vehicles.
- Pack or wear rain gear. This powerful cascade sprays a LOT of water, and you’ll get soaked if you go down to the base of the falls (which you absolutely should!). A raincoat and good waterproof shoes are handy.
- Bring bug spray in the summer. With so much water along the trail, mosquitoes get pretty brutal!
- Google Maps doesn’t always lead to the right place. At one time it was the right road, but fire damage made it impassable. There’s also a very high chance you won’t have cell service, so take screenshots before leaving.
- Trailhead directions: From Highway 242 in downtown Sisters, go south on Forest Road 16/Three Creek Lake. In seven miles, take a right on FR 1514. Just shy of five miles on a slow-going gravel road, turn left immediately before the concrete bridge. Follow the dirt road another mile to the Chush Falls trailhead.
Where to camp nearby
If you want to camp nearby Chush Falls, you have a few options…
Camping close to Chush Falls
Chush Falls sits just inside the Three Sisters Wilderness, in an area where there are no camping restrictions. Because of this, you can camp virtually anywhere in the immediate area—as long as you follow some specific rules.
Most notably, you cannot have a campfire within 100 feet (approximately 37 average adult steps) of a trail or water source. In keeping with Leave No Trace principles, you should also camp somewhere that’s obviously been used before, rather than setting up in a brand new area.
Also, there are no facilities whatsoever in the wilderness area. That means you must pack out your trash and properly dispose of all human and pet waste.
Remember, you’ll also need a Central Cascades Wilderness Permit for all overnight trips between June 15-October 15. They’re available on Recreation.gov, and released in two batches.
In early April, about 40% of the full season’s permits are released. The remainder are released on a rolling basis, seven days in advance. For example, permits for camping on June 18 are available on June 11 (if you don’t get one in April).
Camping in a surrounding area
If you prefer a different area or camping in a more traditional established campground, there are tons of options in the surrounding Deschutes and Willamette National Forests.
We love The Dyrt for scoping out all sorts of campsites, including dispersed camping (which is often free!).
There are also a couple of National Forest campgrounds within a 30-40 minute drive of Chush Falls.
- Cold Springs Campground (32 minutes): Popular campsite with 23 sites, potable water, and vault toilets, open May-October
- Driftwood Campground (40 minutes): 18 rustic sites on Three Creek Lake, open June-September
What to pack for hiking to Chush Falls
- Navigation: we recommend using Alltrails+ to download the offline trail map
- Get your first week of using Alltrails+ for FREE when you sign up using our link!
- Hiking daypack
- Insulated water bottle
- Bug repellant
- Sun protection: sunscreen, hat, sun glasses
- Camera/tripod (this one’s our favorite for hiking)
- Lots of layers (here is a great resource if you’re wondering what to wear hiking)
- Comfortable hiking boots or shoes
- Microspikes (if there is any chance of snow and ice)
- Hiking poles (optional)
- Plenty of snacks: check out our favorite hiking snacks here!
Be sure to download our FREE hiking packing list before your next trip and never leave another essential behind again!
You may also like…
- How to Visit the 7 Wonders of Oregon
- Beautiful Oregon Waterfalls to Visit
- Best Hikes in Oregon (for all ability levels!)
- Best Hikes in Bend, Oregon
Save this article on Pinterest for later…
We want to hear from you!
Have you hiked to Chush Falls in central Oregon? What was your experience like? Are you planning a hike to the falls and have more questions? Comment below and let us know!
We personally use iOverlander rather than Dyrt for camping, but this waterfall is on our list the next time we are in Oregon. Don’t think we will be there in the cold though 🙂